
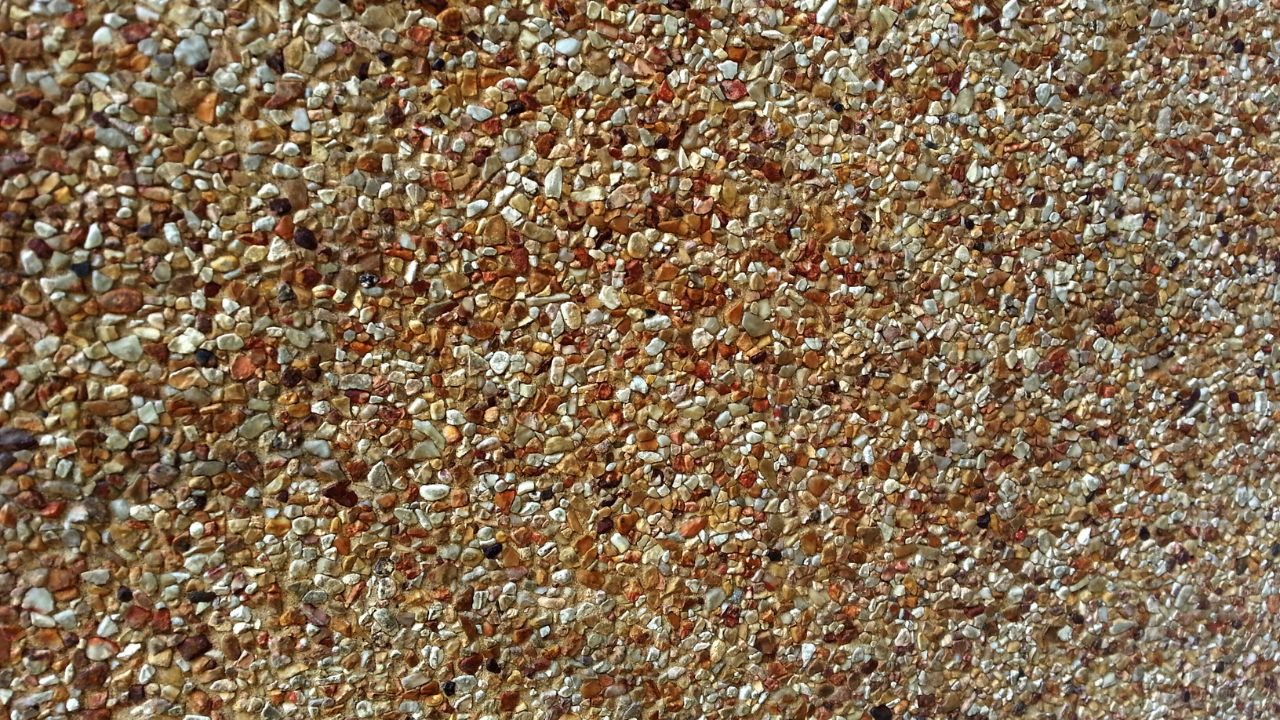
At Textured Concrete Squad Florida, we comprehend the unique appeal of exposed aggregate finishes. These surfaces not only enhance the beauty of outdoor spaces but also offer durability and slip resistance. As we explore the benefits and applications of this finish, you’ll discover why it’s a popular choice for homeowners. Plus, we’ll take you through our meticulous installation process that guarantees lasting quality and satisfaction. Curious about what sets us apart?
Exposed aggregate finish is an enchanting technique that reveals the natural beauty of stones and aggregates within concrete surfaces. When we choose this method, we’re not just creating a functional surface; we’re enhancing our spaces with unique textures and colors. By removing the top layer of concrete, we expose the gems hidden beneath, showcasing the varied sizes and hues of the aggregates.
This finish is versatile, fitting perfectly in residential driveways, walkways, patios, or commercial spaces. It allows us to customize the look by selecting different stones and mixes, giving each project a personal touch. The result is a stunning surface that stands out while maintaining durability.
As we explore exposed aggregate finishes, we discover how this technique blends artistry with practicality, offering a stunning alternative to traditional concrete finishes. It’s an exciting way to elevate our outdoor and indoor spaces!
When we choose exposed aggregate surfaces, we’re not just enhancing the aesthetic appeal of our spaces; we’re also investing in durability and longevity. These surfaces offer excellent slip resistance, making them a smart choice for both safety and style. Let’s explore how these benefits can transform our environments.
Enhancing the aesthetic appeal of outdoor spaces often involves choosing materials that blend beauty with functionality. Exposed aggregate surfaces not only serve practical purposes but also transform our environments into visually stunning areas. The unique textures and colors of these finishes create a mesmerizing look that can complement any design style.
| Feature | Description | Emotional Impact |
|---|---|---|
| Variety of Stones | Wide range of colors | Invokes joy and creativity |
| Textured Finish | Engaging tactile surfaces | Encourages exploration |
| Customization | Tailored designs | Fosters personal connection |
| Natural Look | Organic, earthy feel | Promotes tranquility |
With exposed aggregate, we can elevate our outdoor spaces, making them inviting and enjoyable for everyone.
While we appreciate the aesthetic appeal of exposed aggregate surfaces, their durability and longevity are equally impressive. These surfaces can withstand the test of time, making them a smart choice for any project. Here are some key benefits that truly stand out:
With these qualities, exposed aggregate surfaces prove to be both a beautiful and practical investment for any space.
One of the standout features of exposed aggregate surfaces is their impressive slip resistance, which makes them an excellent choice for both residential and commercial applications. When we walk on these surfaces, we notice they provide better traction, especially in wet or slippery conditions. This quality greatly reduces the risk of slips and falls, which is essential for safety in high-traffic areas like driveways, walkways, and patios. Plus, their textured finish not only enhances grip but also adds visual appeal. We can feel confident knowing that exposed aggregate surfaces combine functionality with aesthetics, making them an ideal option for anyone looking to improve safety without sacrificing style. Ultimately, it’s a win-win for our spaces.
Exposed aggregate finishes offer a unique blend of aesthetics and functionality, making them ideal for a variety of applications. We often see these stunning surfaces enhancing both residential and commercial spaces, providing not just beauty but also durability. Here are some perfect applications for exposed aggregate:
Now that we’ve explored the ideal applications for exposed aggregate, let’s look at the installation process. We’ll cover the essential steps of preparation and planning, followed by various finishing techniques. This overview will help us understand how to achieve a beautiful, durable finish together.
As we commence on the journey of installing an exposed aggregate finish, careful preparation and planning lay the foundation for a successful project. This stage is essential, and here’s what we’ll focus on together:
To achieve a stunning exposed aggregate finish, we must carefully follow a series of essential finishing techniques during the installation process. First, after pouring the concrete, we’ll wait for it to set just enough, allowing the surface to firm up without losing its workability. Next, we’ll use a concrete retarder to delay the surface drying, which helps us expose the aggregate effectively.
Once we’ve applied the retarder, it’s time to wash away the top layer, revealing the beautiful stones underneath. We need to scrub gently to avoid damaging the aggregates. Finally, we’ll let the surface cure properly, ensuring durability and longevity. By paying attention to these techniques, we create a visually appealing and robust finish that enhances any space.
When we commence on the journey of creating an exposed aggregate finish, selecting the right materials is crucial for achieving the desired aesthetic and durability. The choices we make will not only influence the look of our surface but also its longevity. Here are four key materials we should consider:
Before we start the installation, we need to clear the work area of any debris and obstacles. It’s also essential to assess the soil conditions to guarantee a stable foundation. Finally, we’ll mark the installation boundaries to keep everything organized and on track.
As we plunge into clearing the work area, it’s vital to guarantee the site is properly prepared for the installation of an exposed aggregate finish. A clean and organized environment not only enhances our efficiency but also secures a stunning final product. Here’s what we need to do:
With the work area cleared, we can now focus on evaluating soil conditions to guarantee a solid foundation for our exposed aggregate finish. First, we’ll check the soil’s stability by probing it with a hand tool. If it’s too loose or soft, we may need to compact it or even remove some layers. Next, let’s assess the drainage; we don’t want standing water, which can weaken our installation over time. We should also look for roots, rocks, or debris that might interfere with our work. By ensuring the soil is firm and well-drained, we set the stage for a successful installation that lasts. Taking these steps now saves us time and hassle later on.
To guarantee our exposed aggregate finish looks professional and is installed correctly, we need to clearly mark the installation boundaries. This step sets us up for success, ensuring we’re all on the same page and avoiding costly mistakes. Let’s focus on these key actions:
Mixing and pouring the concrete is an essential step in achieving a flawless exposed aggregate finish. We begin by gathering our materials: cement, sand, gravel, and water. It’s imperative to measure these components accurately to guarantee the right consistency. We mix the dry ingredients first, then slowly add water until we reach a workable, thick paste.
Once mixed, we pour the concrete into our prepared area, making sure it fills every corner without air pockets. It’s essential to spread the mixture evenly, using rakes or shovels to eliminate any inconsistencies. We take our time here, as a smooth surface is key for the final look.
After pouring, we level the surface with a screed board, making sure it’s flat and uniform. This attention to detail during mixing and pouring lays the foundation for a beautiful exposed aggregate finish. Let’s move on to the next steps once this is set!
After the concrete has cured, we can start exposing the aggregate to reveal the beautiful stones hidden beneath the surface. This process not only enhances the aesthetic appeal but also adds durability to our concrete. Here are four techniques we can use to uncover that stunning aggregate:
Each technique has its charm, and together, they help us create a visually striking finish!
Now that we’ve exposed the aggregate, it’s essential we focus on curing and finishing the surface properly. We’ll explore why the curing process matters, look at effective surface sealing techniques, and discuss how to conduct a final surface inspection. By doing this, we’ll guarantee our finished product not only looks great but lasts for years to come.
While we focus on the aesthetic appeal of exposed aggregate finishes, the curing process is essential for ensuring the durability and strength of our installation. Proper curing helps prevent issues that can compromise our hard work. Here are four key reasons why we shouldn’t overlook this step:
Let’s prioritize curing for lasting beauty!
To achieve a stunning exposed aggregate finish, we need to focus not just on the curing process but also on effective surface sealing techniques. Sealing the surface protects our beautiful work from stains, moisture, and wear. We typically use a high-quality acrylic or epoxy sealer, applying it evenly with a roller or sprayer. It’s essential to make certain the surface is clean and dry before we start. We’ll want to apply at least two coats, allowing adequate drying time between applications. This enhances the color and shine of the aggregate, giving it that sought-after glossy finish. Regular maintenance and resealing every few years will keep our exposed aggregate looking fresh and vibrant, guaranteeing it stands the test of time.
Before we start enjoying our newly installed exposed aggregate surface, we must conduct a thorough final inspection to confirm both proper curing and finishing. This step guarantees that our hard work pays off with a beautiful and durable finish. Here’s what we should check:
Maintaining an exposed aggregate finish is essential if we want to guarantee its longevity and beauty. To start, we should regularly sweep the surface to remove dirt and debris, preventing stains and buildup. Using a pressure washer can help, but we must be careful not to use too much pressure, which could damage the surface.
Next, we should seal the finish every few years to protect it from moisture and staining. Choosing a high-quality sealer designed for exposed aggregate is vital. We also need to address any spills immediately, cleaning them with mild soap and water to avoid lasting stains.
In colder climates, we should avoid using de-icing salts, as they can harm the finish. Instead, we can use sand for traction. By following these simple maintenance tips, we can keep our beautiful exposed aggregate finish looking great for years to come.
When we consider design options for our exposed aggregate finish, the possibilities are nearly endless. We can truly personalize our space, creating a stunning aesthetic that reflects our style and vision. Here are some exciting ways we can customize our exposed aggregate finish:
As we explore the cost considerations for installing an exposed aggregate finish, it’s essential to evaluate several factors that can influence our overall budget. Understanding these factors helps us make informed decisions.
| Factor | Estimated Cost Range | Notes |
|---|---|---|
| Materials | $3 – $7 per sq. ft. | Includes aggregates and additives. |
| Labor | $2 – $5 per sq. ft. | Professional installation is recommended for best results. |
| Site Preparation | $1 – $3 per sq. ft. | Costs vary based on site conditions. |
| Sealing | $0.50 – $2 per sq. ft. | Essential for longevity and appearance. |
| Design Complexity | Varies considerably | Custom designs can increase overall costs. |
While we evaluate different finishing options for our concrete surfaces, comparing exposed aggregate to other finishes reveals unique benefits and drawbacks. Exposed aggregate stands out for its texture and durability, but we should also acknowledge other popular options.
Here are some key points to examine:
Choosing Textured Concrete Squad Florida means opting for a team dedicated to delivering exceptional quality and craftsmanship. We’re passionate about creating stunning exposed aggregate finishes that not only enhance your property’s aesthetic but also provide durability and longevity. Our experienced professionals understand the intricacies of textured concrete, ensuring every project is tailored to your unique vision.
We utilize the latest techniques and high-quality materials to guarantee a flawless result. Our commitment to customer satisfaction drives us to maintain open communication throughout the process, so you’re always in the loop. Plus, we recognize how important it is to stay within budget and timeline, and you can count on us to deliver on both.
When you choose us, you’re choosing reliability, expertise, and a team that genuinely cares about bringing your ideas to life. Let’s transform your outdoor space together with a beautiful exposed aggregate finish that stands out!
At Textured Concrete Squad Florida, we believe that our work speaks for itself, and nothing showcases our commitment to quality better than the testimonials from our satisfied customers. We’re proud to share their experiences, as they highlight the impact of our exposed aggregate finish installations. Here are some of the heartfelt stories we’ve received:
These testimonials remind us why we do what we do. When we see our clients thrilled with their new concrete finishes, it drives us to continue delivering exceptional results every time. Your satisfaction is our top priority!
When we think about exposed aggregate finishes, we’d say they can last 20 to 30 years with proper care. Think of it as the fine wine of concrete—it gets better with time! Regular maintenance, like sealing and cleaning, helps it withstand the elements. If we treat it right, we’ll enjoy its beauty and durability for decades. So, let’s invest in it, and it’ll repay us with a stunning surface for years to come!
Yes, we can apply exposed aggregate to existing concrete! This process involves cleaning and preparing the surface to guarantee proper bonding. We’ll then apply a special mix that reveals the aggregate when finished. It not only enhances the appearance but also improves durability. However, we must assess the condition of your existing concrete first to guarantee it’s suitable for this application. Let’s explore how we can transform your space together!
We recognize you might think climate doesn’t matter much for installation, but it truly does. Hot, dry conditions can cause the surface to dry too quickly, risking cracks. Conversely, cold or wet weather can impede curing, affecting the finish. Ideally, we should aim for moderate temperatures and dry conditions to guarantee a successful application. By considering these factors, we can achieve a beautiful, durable exposed aggregate finish for your project.
Yes, we find that exposed aggregate can be safe for slippery conditions. The texture created by the exposed stones provides better traction compared to smooth surfaces, reducing the risk of slipping. However, we should still consider maintenance and proper sealing to guarantee ideal safety. In wet or icy weather, it’s always a good idea to exercise caution, but overall, exposed aggregate can be a durable choice for enhancing grip in various environments.
Choosing the right color for our aggregate finish can feel overwhelming, but it’s essential. We can juxtapose light and dark shades to create striking contrasts or opt for harmonious tones for a more subtle look. Think about the surrounding landscape and architecture; do we want our finish to stand out or blend in? Ultimately, let’s consider our personal style and the atmosphere we wish to create, ensuring our choice enhances our space beautifully.
 Call Now